My first veggie patch started with one small raised bed, growing tomato.
The reason was simple: my whole family loves tomatoes. We eat them constantly. And the idea of picking a homegrown tomato—warm from the sun, perfectly juicy, that deep sweet-tart flavor you just don't get from a grocery store clam-shell—that idea had all of us hooked. Even the skeptics in the house were on board. Everyone was rooting for that little raised bed.
If you've read some of my earlier posts, you already know how the soil saga went. I made a total fool of myself filling that bed, and my family still brings it up. But the soil story was just one chapter. There were other heartbreaks too.
That summer, my tomato plant grew to maybe two feet tall. It was leggy and hopeful and never produced a single flower. Not one. By August, the heat rolled in and scorched it to a crisp.
If I could start over now—knowing what I know, but more importantly, knowing what not to overthink—I'd do a few things differently. Not perfectly. Just differently. And that's what I want to share with you.
This isn't a comprehensive guide. It's a conversation over the fence with someone who's killed plants and kept going. Let's talk about starting your own veggie patch.

Step 1: Pick Your Spot (don't overthink it, just look at the light)
When I chose the spot for my first raised bed, I prioritized level ground over sunlight. There was a flat area against the wall of my backyard that seemed perfect—no tree roots, easy access to the hose, tidy and out of the way.
What I didn't account for: that wall cast a long shadow. By early afternoon, the bed was in full shade. My tomatoes, which crave sunlight like they're solar-powered, were getting maybe four hours of direct light on a good day. They stretched tall and thin, reaching for sun that simply wasn't there.
Here's the simple version: most veggies need at least about six hours of direct sunlight a day. So go outside. Watch where the sun actually falls. Not where you wish it fell, but where it lands and lingers. Watch at different times—morning, noon, late afternoon. The sunniest spot might not be the prettiest or the most convenient. That's okay. You can fix a lot of things in a garden. You can improve bad soil. You can adjust drainage. You can build supports. But sunlight? Once you pick the spot, there's not much you can do to change it. Put the plants where the light is.
And one thing nobody told me back then: put your veggie patch somewhere you walk past every single day. If it's tucked behind the garage or hidden in a far corner, you'll forget it exists. Visibility is a form of care. You'll notice when the soil looks dry. You'll spot a pest problem before it explodes. You'll see that one perfect bean ready to pick. Proximity isn't lazy—it's practical.
Step 2: Choose Your Plants (and lower your expectations a little)
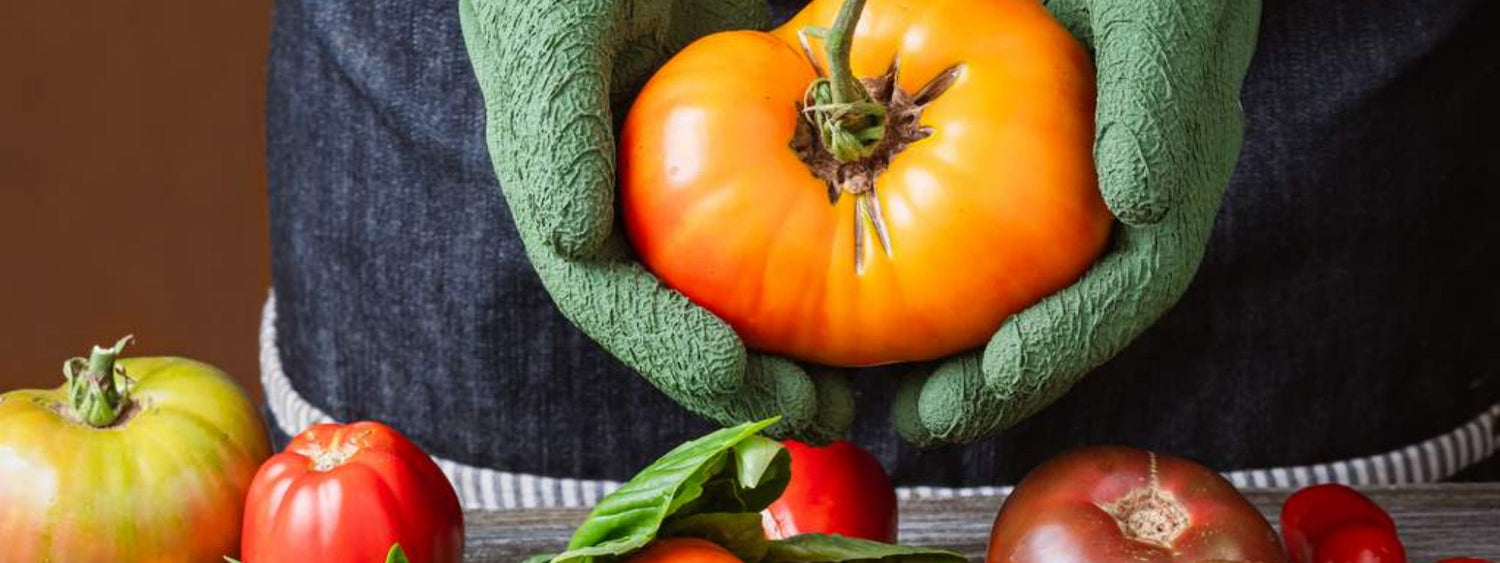
I chose tomatoes because my family eats tomatoes constantly. On sandwiches, in salads, roasted into sauce, sliced with salt. The dream of walking outside and picking a warm, vine-ripened, perfectly juicy organic tomato—no plastic clamshell, no refrigeration—that dream had me by the heart.
And honestly? I still think the principle was right. Grow what you and your family actually eat. Not what's trending on social media. Not what some blogger with a perfect garden is showcasing. What lands on your dinner table, week after week.
But here's what I'd add now, with a few seasons behind me: some things are just harder than others.
Social media makes everything look easy. Push a seed into the soil, water it, cue the time-lapse, and boom—harvest. What those videos conveniently skip is everything that happens in between. The watering schedule. The pest pressure. The pruning decisions. The weather that doesn't cooperate. The daily attention that separates a thriving plant from one that's slowly giving up.
Tomatoes are wonderful. They're also prone to disease, sensitive to watering inconsistencies, heavy feeders, and targets for every hornworm and blight in the neighborhood. For a first veggie patch, I might still plant one—because hope springs eternal—but I'd hedge my bets with easier wins too.
A seasoned gardener once told me something that has held up surprisingly well: the bigger the seed, the easier it tends to be. Beans, peas, squash—these seeds are large enough to handle easily, they germinate reliably, and they grow fast enough to give you that early confidence that keeps you going. Tiny seeds like lettuce and carrots are wonderful, but they're also fussier and easier to lose. If you're just starting out, give yourself the gift of big seeds and quick wins.
Step 3: Prepping Your Soil (you don't need a lab coat for this)
I remember reading gardening articles that talked about soil testing, pH levels, nutrient profiles, and soil structure, and I remember my eyes glazing over. I thought I needed to be some kind of scientist just to grow a tomato. For a minute, I almost gave up before I'd even started.
Here's what I've learned since: most soil wants to grow things. It just needs a little kindness.
If you're working straight into the ground, loosen up the top six to eight inches. Pull out the big rocks and any obvious debris. Then add compost. If you have gardening friends who make their own, ask them nicely—homemade compost is black gold, and gardeners love sharing it. If not, grab some from a local nursery. Mix it into your soil. That one step alone already puts you ahead.
But here's my honest recommendation for beginners: if your native soil is less than ideal—heavy clay, pure sand, full of construction fill—start with a raised bed. Even a small one. It gives you a controlled environment where you're not fighting the ground from day one. You fill it with good soil from the start, and everything that happens after is a little bit easier.
One unexpected thing that happened to me: I became genuinely fascinated by soil. After building my first raised bed, I found myself standing in the garden center aisle, reading the backs of soil bags like they were novels. Words like peat moss, vermiculite, aged bark fines, composted poultry litter—they looked like a foreign language at first. But I looked things up, one term at a time, and slowly the labels started to make sense. I began to understand why some bags cost more than others, what mattered and what was marketing. That knowledge compounds. Now I walk into a nursery and know what I'm looking at. It's a quiet superpower.
Step 4: Actually Planting (your hands are the best tools you own)
The back of the seed packet is your best friend. It tells you spacing, depth, and timing. Don't wing it on the first try. I winged it. I buried tiny lettuce seeds half an inch deep because I didn't know any better, and they never saw the light of day.
Here's a rough rule I learned the hard way: bigger seeds go deeper, tiny seeds barely get covered. Beans and peas? About an inch down. Poke a hole with your finger, drop the seed in, cover, pat gently. Lettuce, basil, and carrot seeds? Press them into the surface of the soil and sprinkle just a dusting of soil on top—barely enough to block the light.
There are a million seeding tools on the market—dibbers, seed sowers, spacing templates—and I've tried a few. But my honest experience? Your hands are the best tools you own. They're precise enough once you slow down and pay attention. If you want a guide for spacing, a piece of string or a straight stick works perfectly. Nothing fancy required.
A note on watering after planting: use the gentlest setting on your nozzle. Think soft rain, not power wash. Those tiny seeds resting near the surface can get blasted right out of place by a hard stream of water. I learned this the day I watched my carefully planted carrot seeds wash into a corner of the bed in one enthusiastic watering session. Now I use a watering can with a fine rose, or I hold the hose low and let the water fall softly, like it's arriving naturally.
Step 5: Care and Maintenance (routines beat willpower every time)
If you've made it to this step—congratulations. Your veggie patch is officially in the ground. That's a real accomplishment, and you should feel good about it.
But I'm going to be straight with you: the first four steps were the setup. Now the real work begins.
I'll be honest—I don't love how social media tends to show this stage. People post the planting day, and then the harvest day, and everything in between gets compressed or skipped entirely. What actually happens during those weeks and months is the heart of gardening. It's also the hardest part. You might face a brutally hot and humid summer. Or an unusually rainy spring that rots your seeds in the ground. Or an aphid infestation that appears overnight. You'll lose plants. You'll make mistakes. You'll have moments where you wonder why you're doing this at all.
And then—you'll harvest something you grew yourself, and none of that will matter.
Here are the basics of ongoing care, distilled into what I wish I'd known:
Watering:Don't water on a whim or a rigid schedule. Check the soil. Stick your finger in down to the second knuckle. Dry? Water deeply. Still moist? Walk away. Different plants want different things—rosemary likes it on the drier side, basil likes consistently moist soil. Get to know what each plant actually prefers.
Feeding:Not every plant is a heavy feeder. You don't need to blanket-fertilize everything out of anxiety. Some plants, like tomatoes and squash, are hungry and benefit from targeted feeding. Others, like beans and many herbs, are more self-sufficient. Learn your plants' needs and feed accordingly, not with a heavy hand.
Weeding:If you walk through your veggie patch for five minutes every day, weeding stops being a crisis. Small weeds pull out easily. It's when you ignore them for two weeks that they become a project. That daily walk is also just... nice. It's a chance to look, to notice, to be present.
Thinning and Pruning:This used to terrify me. I felt like I was hurting the plants. Cutting anything felt wrong. But thinning is just correcting for overenthusiastic seeding—giving the strongest plants room to actually grow. And light pruning—removing dead leaves, pinching basil tips, cutting back leggy growth—becomes second nature once you start. Fold it into your daily five-minute walk. Observation builds the intuition.
Pest and Disease Management:As a beginner, my single best piece of advice is to talk to a neighbor who gardens. Seriously. Pest and disease issues are often local—what plagues gardens in Georgia might not be the same as what hits the Pacific Northwest. An experienced gardener in your area has already dealt with what you're about to deal with. They'll have a method, and it's often surprisingly simple and organic. You don't need to become an expert on everything. Just learn what's most likely to show up where you live, and start there. Most gardeners I've met are genuinely happy to share what they know. Let them.

My first tomato plant died without ever giving me a single fruit. I spent too much money on things I didn't need, and I made mistakes I could have avoided if I'd asked a few more questions. But I also started something. I put seeds in the ground. I paid attention. And the next season, I tried again, with a little more knowledge and a little less fear.
You don't need a green thumb. You don't need expensive tools or perfect soil or a degree in horticulture. You just need to start. Pick a sunny spot. Choose a few things you love to eat. Get your hands in the dirt. Mess up, adjust, and keep going.
You're already a gardener the moment you put a seed in the ground. The rest is just practice.
You may also enjoy these related blogs:
How to Prevent Weeds in Raised Garden Beds (Simple, Low-Maintenance Methods That Actually Work)
Raised Garden Bed Layout Ideas for Any Backyard (Small to Large Spaces)
Essential Herb and Vegetable Companion Planting Combinations for a Thriving Garden


Leave a comment
This site is protected by hCaptcha and the hCaptcha Privacy Policy and Terms of Service apply.